


Facebook posts can reach millions, but only if they’re shareable. In other words, you must set your post’s privacy so everyone can view it. Only public posts (with a globe icon) can be shared by others. Setting your posts to Public greatly boosts reach and engagement.
In this guide, we’ll walk through step-by-step how to make any Facebook post shareable on both profiles and Pages (desktop or mobile), explain the differences for group posts, and share tips on creating content people will love to share.
Understanding Facebook Post Privacy

On Facebook, every post has a privacy setting that controls who can see or share it. Common icons include a globe (Public), two silhouettes (Friends), a gear (Custom), or a padlock (Only Me). A Public post can be viewed and shared by anyone on or off Facebook. By contrast, a Friends-only post can only be reshared by your friends, and “Only Me” posts aren’t shareable at all.
In fact, if you see a globe icon by a past post’s timestamp, “it means that you’ve already made your post public and there’s nothing for you to change”.
Making an Existing Profile Post Shareable
To change a post after you’ve posted it (on your personal profile):
- Find the post on your timeline or profile.
- Click the three-dot menu (⋯) in the upper-right corner of the post.
- Select Edit Privacy (or Edit Audience).
- In the audience drop-down, choose Public (globe icon) and save.
Example: In Facebook’s post menu, tapping “Edit Privacy” lets you choose Public so anyone can share the post. After this, anyone (including people not on your friends list) will see a Share button on that post. They can now repost it to their own timeline or share it with others.
Creating a New Shareable Post (Profile)
When you create a new post, you can set it to Public from the start. Here’s how:
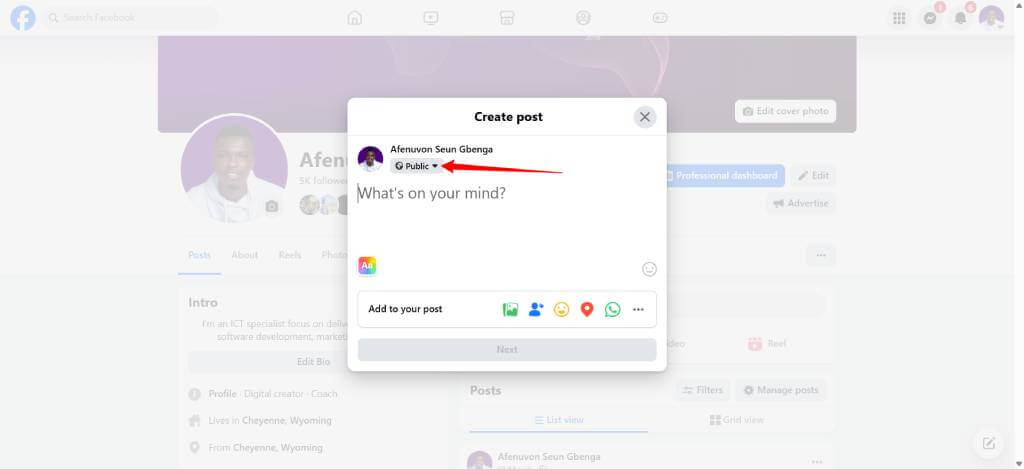
- On a web or mobile app, click or tap “What’s on your mind?” to open the post composer.
- Look for the audience selector (under your name). It might say “Friends” or show an icon (silhouettes, etc.).
- Tap the audience button, and a menu appears.
- Select Public from the list and post as usual.
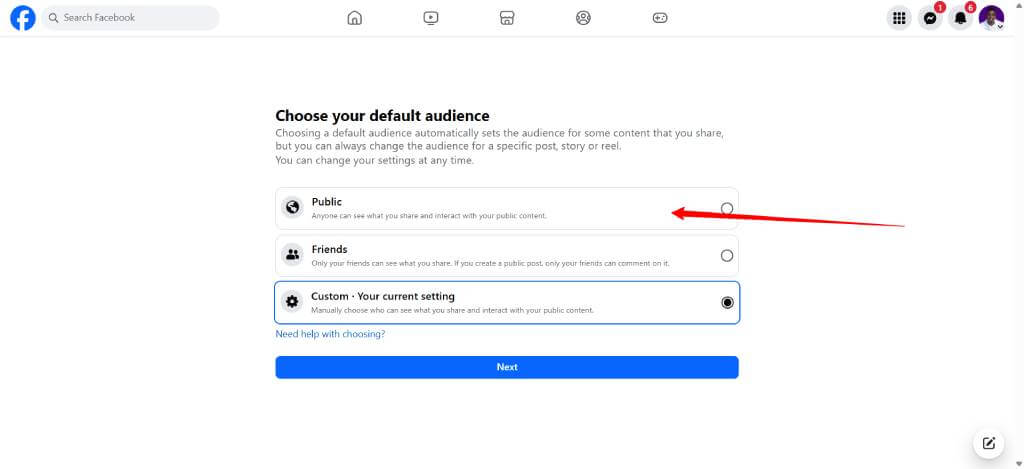
Screenshot: In Facebook’s post dialog, click the audience selector (it may say “Friends”) to change your privacy.
Screenshot: Choose Public (globe icon) to make the new post visible and shareable by anyone.
Making your post Public before you post ensures it’s immediately shareable by all users.
Setting All Future Posts to Public
If you want every new post to be shareable by default, adjust your privacy settings:
- In Facebook (app or website), click the menu (on desktop it’s the downward arrow in top-right; in mobile app it’s the three-line “hamburger”).
- Go to Settings & Privacy → Settings.
- Navigate to Audience and Visibility (or Privacy depending on Facebook’s layout) and find “Who can see your future posts?” or “Public Posts”.
- Set your default audience to Public.
This change means all future timeline posts you create will automatically be Public (shareable) unless you manually change the audience. It saves you from having to flip the selector each time.
Shareable Posts on Facebook Pages
If you manage a Facebook Page (business, brand, or public figure page), posts are already Public by default. You do not need to adjust privacy on page posts – anyone can share them. To share a page’s post (for example, re-posting on your own profile):
- Go to the Page and find the post.
- Click or tap the Share button under the post.
- Choose where to share it (your timeline, a group, etc). It will be shared as a Public post.
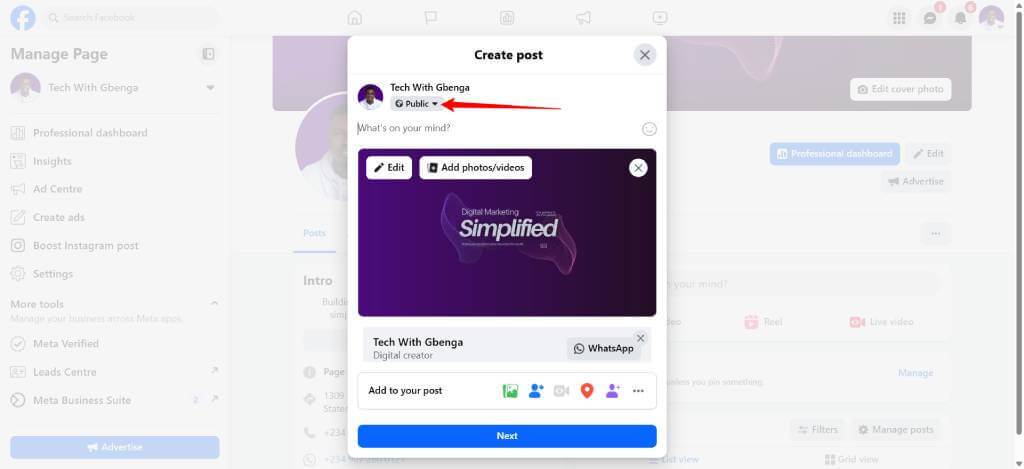
Screenshot: A Facebook Page post with the Share button (highlighted). All page posts are public by default, so anyone can press Share.
This means marketers and brands don’t have to worry about visibility on Pages – their content is already open to maximum sharing.
Sharing in Facebook Groups (Public vs Private)
For Facebook Groups, shareability depends on the group’s privacy:
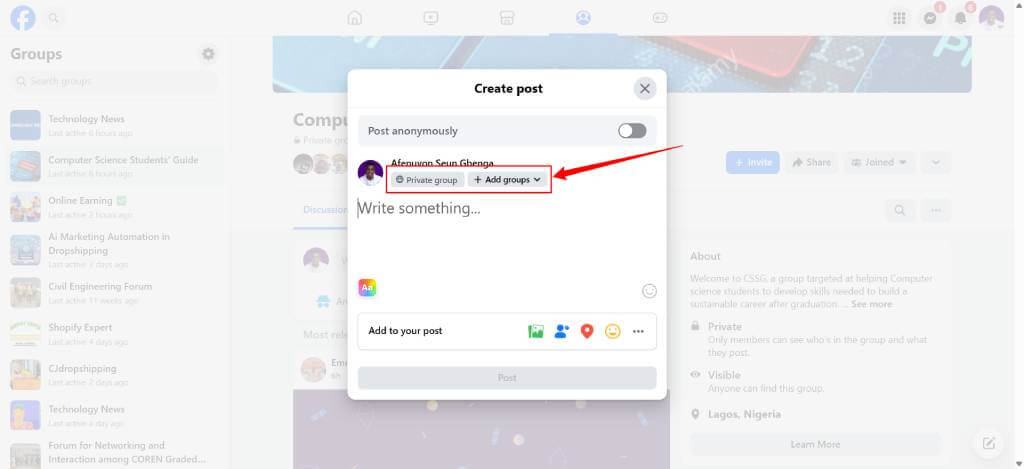
- Public Groups: Any post you make in a public group can be seen by anyone (even non-members) and is shareable by group members. Members will see a Share button on each post. You can simply write your post in the group; it’s automatically public.
- Private Groups: Posts in a private group are only visible to members of that group. They cannot be shared outside the group. If your content is in a private group, only group members see it. To make it shareable externally, you would need to repost it on your profile or page as Public, then share that link to the group.
Put simply, any post in a public group is shareable (visible to all), whereas private-group posts stay within the group.
Benefits of Making Posts Shareable
Setting posts to Public isn’t just a technical detail – it unlocks a much bigger reach. Making your post shareable “can significantly increase your reach” and keeps you part of the latest viral trends. When you allow shares:
- Better brand awareness: More people will see your content outside your immediate network.
- Increased engagement: Shares drive likes and comments from a wider audience, bumping your posts in others’ feeds.
- Boosted reach: Every time someone shares, it reaches their friends and followers too. This snowballs: “making your post shareable on Facebook is essential when better reach is your main goal”.
By contrast, posting only to “Friends” or “Only Me” will limit these benefits. Experts emphasize: “don’t make your post private. Make it public, for the whole world to see it,” because that’s how you get maximum visibility.
Tips for Creating Share-Worthy Posts
A shareable post must not only be public, but also interesting enough to share. Here are some proven tips:
- Use eye-catching visuals. Posts with images or videos get more shares. High-quality photos, infographics, or short videos grab attention and encourage resharing.
- Write engaging captions. Headlines or questions that spark curiosity (“Have you tried this?”, “Caption this!”) prompt people to share with friends.
- Ride trends. Tapping into trending topics or challenges (current events, viral memes, hot products) helps because people want to join the conversation. Always staying “in the loop” gives your posts greater share appeal.
- Be interactive. Quizzes, contests, giveaways or calls-to-action (“Tag a friend who…” “Share if you agree”) encourages users to engage and spread your post.
- Know your audience. Understand what your friends or customers care about. Content that resonates with their interests and values is far more likely to be shared.
By combining the right privacy setting with high-quality, relevant content, you maximize the chance your post will be passed along.
Summary
In summary, making a Facebook post shareable simply means setting it to Public. For personal profiles, use the three-dot menu on an existing post (Edit Privacy) or set the audience when creating a new post. You can also change your default audience in Settings so all future posts are Public.
Page posts are already public, and public group posts are shareable by design. Private posts/groups will stay private. Once public, a post’s visibility can skyrocket – an essential strategy for personal users and marketers alike looking to “go viral” and expand reach.